Creating a professional invoice is essential for every small business. Not only should you focus on making quality invoices, but you should also plan for a timely delivery.
Say goodbye to creating invoices in Microsoft Excel, Word, Google Docs, or on paper. Skynova’s invoice template allows you to create, edit, and send professional invoices in minutes — and completely online. You can also download your invoices as PDFs or send them directly to clients with our invoicing software.
Are you unsure how to create an invoice? This article will explain how you can make customized invoices using Skynova’s free invoice form in five steps.
What Is an Invoice?
Not too long ago, invoices were primarily paper documents physically delivered to clients. However, the evolution of digital technology has allowed businesses to create, store, and monitor their online invoices, even from mobile devices. Small business owners and freelancers can now quickly send invoices, keep track of multiple invoices simultaneously, and have a tighter grip on their accounting. This ensures that both parties fulfill their payment terms.
Invoices are used to record transactions between a buyer and a seller. They are similar to receipts, as the document is itemized to show the entire transaction of products or services. It’s important to note that invoices are time-stamped, which shows the time and date that the services were billed and when the transaction was officially recorded. The invoice date is critical for payment because it also affects the due date, which is typically 30 days after the invoice date.
How to Make a Simple Invoice
Completing the necessary paperwork to run a small business can be intimidating. Luckily, there are solutions to help expedite and improve this process. Creating and sending a professional invoice doesn’t have to be complex. In fact, Skynova’s free invoice generator allows you to create invoices quickly and efficiently.
In this guide, we’ll cover how you can simplify your invoicing process. By cutting back on time it takes to perform administrative work, you can spend time on what really matters to you and your small business. Follow the five simple steps below to create and send a professional invoice using the Skynova invoice template.
1. Include Business and Client Contact Information
You’ll need to add the contact information for your business and the client to the invoice header. Every invoice that you send should clearly specify the sender and recipient. As a small business owner, you should add your personal and business names to the "Your Name" field, located at the top of the invoice template. Next, you will need to add your client’s name in the "Customer Name" field.
Once you have added your business name and the client’s name, you’ll need to add everyone’s contact information, including street addresses, phone numbers, and email addresses. By taking the time to include this additional contact information, you can ensure you have the correct client information, and they can contact you if needed.
You should also consider adding a logo with your company name to customize your invoice. Click on "Show Customization Options" at the top, and you’ll see several options. Just check "Logo," and you’ll be able to upload an image to the right side of your invoice.
2. Add an Invoice Number
Another important step is to add the invoice number. The invoice number is particularly important for managing accounting purposes. It’s helpful for both internal and external reference because it contains information regarding the services or products related to billing.
You may need to reference a particular invoice in time, which makes it essential to have a unique invoice number. With Skynova’s free invoice template, you can choose any combination of numbers in "Invoice #" field on your first invoice. When you create your second invoice, our software will automatically increment your invoice number from the previous invoice to ensure it’s unique. You’ll never have to worry about saving a nonunique invoice number because the program won’t allow you.
Newer small business owners may want to start with an invoicing number that does not indicate inexperience. For instance, you may decide to start with #401 instead of #001.
3. Add Work and Payment Due Dates
Next, you’ll want to add dates to the invoice. First, you will need to add the "Invoice Date." This is the date the invoice was created. For example, if you finish the service on a Friday afternoon but don’t create the invoice until Monday morning, you will need to put the "Invoice Date" as Monday. By sending out invoices quickly, you can get paid faster, which is why we recommend sending them as soon as the work is done.
After adding the "Invoice Date," you will need to add the "Due Date." Every invoice needs a due date so that you get paid within a certain time frame. Typically, the due date should be discussed before you begin work. Sending an estimate to a prospective client can help ensure that your business’s fees are agreed to before you begin the job.
Skynova’s estimate template allows you to create a comprehensive estimate for your service. Once accepted by a client, the estimate can be converted to an invoice. We recommend adding the proposed time frame between the "Invoice Date" and "Due Date" in the "Notes" section. This way, you ensure that the client is aware of late payments and any attached late fees.
4. Calculate Cost of Supplies and Services
Depending on your industry, you will need to fill in the cost of supplies, services, or labor. Whether you choose to charge a project fee or an hourly fee, our invoice template can simplify the process.
For example, a writer might charge an hourly rate of $30 an hour and complete the project over two days. The first day, they might have worked eight hours. When they add the labor cost to the invoice template, the writer will simply select "Hours" in the "Item" drop-down menu.
Then, they should add a description, which could be "Outline and Research." Additionally, they should add the "Unit Price," which would be the hourly rate of $30, and the "Quantity," which is eight hours. The next day, the writer might work four hours, which they would note in the "Quantity" section. Together, these line items equal the amount due, which would be $360.
Alternatively, some small businesses might choose to charge a flat project rate. For example, a photographer might sell an engagement package. The photo shoot aspect might cost $350, while the editing portion could account for an additional $150.
In this case, the photographer would select "Service" from the "Item" drop-down menu and add a short description. In this case, the photographer might have two line items: photo shoot and editing. The "Unit Price" would be the overall cost of the specific "Item." This means that the photo shoot’s unit price would be $350, while the editing package unit price would be $150. Since there were only one photo shoot and editing package, the photographer would input "1" for each "Quantity." Altogether, the subtotals would equal a total amount of $500.
5. Enter Any Details and Discounts
It’s important to consider additional details and discounts. The "Description," which is located beside the line item, provides the perfect opportunity to elaborate on any charges. However, this might not always provide sufficient space. For this reason, we recommend typing any additional details into the "Notes" section of the invoice template.
Depending on your type of business and state, you may be required to collect sales tax. For instance, a photographer selling a physical print of their work would be subject to sales tax. In some cases, even selling photography online might be subject to sales tax. For this reason, it’s important to consult an accounting professional to determine if you will need to incorporate a sales tax into your invoice. After saving your invoice, you can account for sales tax by checking the "Sales Tax" box in the "Customization Options" section. This will add a space for you to add tax beside "Quantity."
The "Notes" section is also the ideal place to include payment instruction. For example, if you and the client agreed on using PayPal as a payment method, you might consider adding brief instructions on your invoice. In this case, you might provide your PayPal information. Alternatively, if your client wants to pay by credit card or debit card, you might add to the "Notes" section that processing fees apply.
Finally, you might consider providing a discount. In some cases, small businesses might offer a discount for new clients. This discount should be noted on the invoice to ensure that your client understands they are receiving a discount.
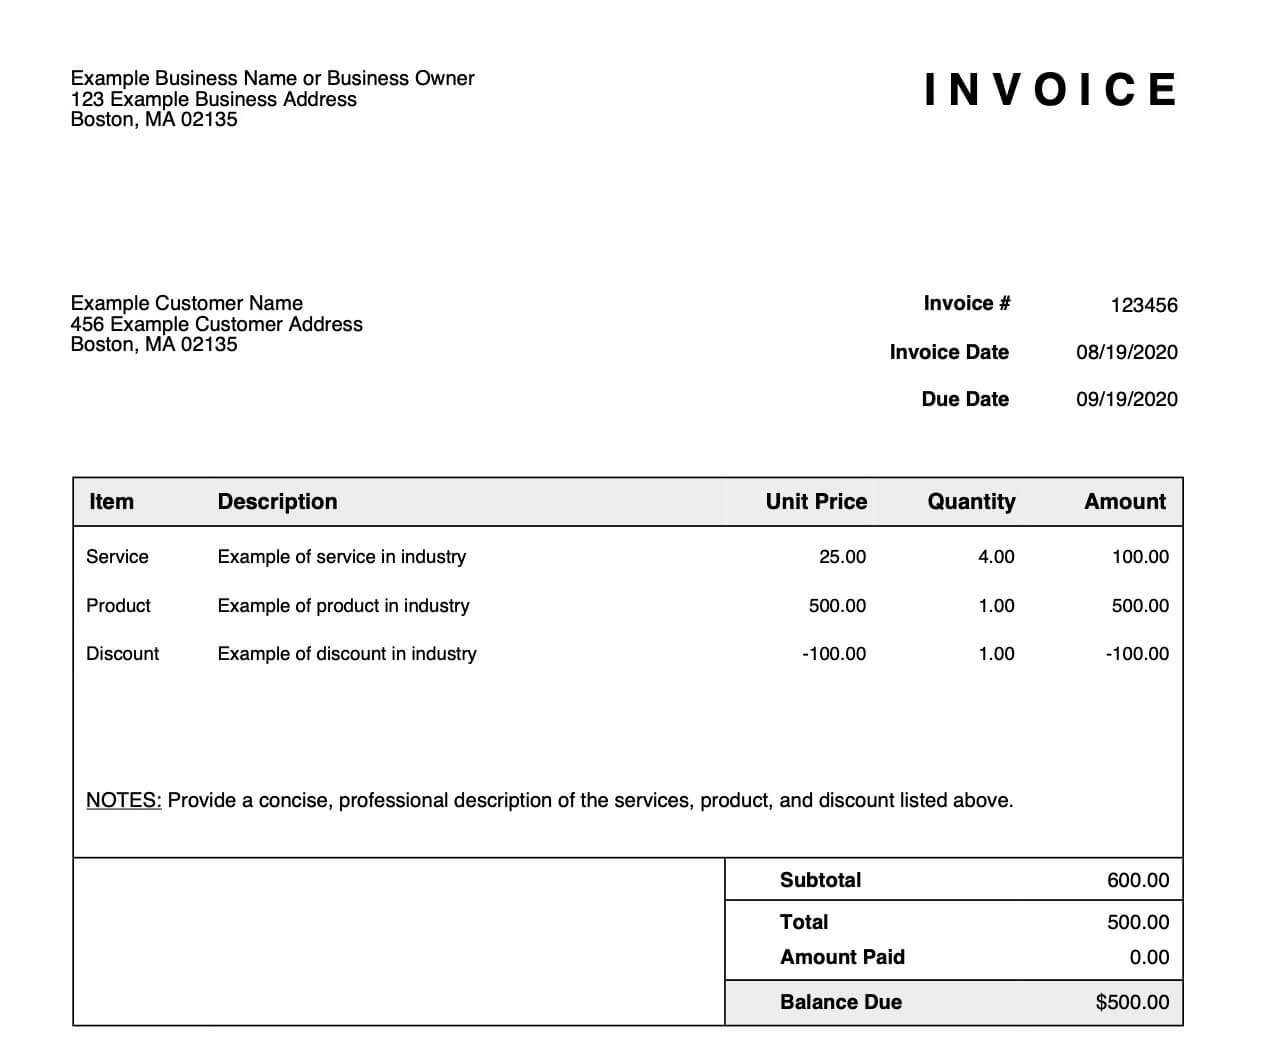
Adding a discount to the invoice template is simple. All you need to do is select "Discount" from the "Item" drop-down menu and enter the discount amount in the "Unit Price." It will appear as a negative number and automatically be subtracted from the total invoice amount.
Track and Manage Invoices With Skynova’s Invoicing Software
As a small business owner, your time is precious. By using Skynova’s free invoicing template, you can cut back on time you spend performing administrative tasks and get back to what you’re passionate about.
Skynova is dedicated to helping small business owners evolve. That’s why we’ve developed our intuitive platform. Whether you need templates or other software products, Skynova has free tools to help your business. By simplifying the administrative tasks necessary for your small business, you can get paid more quickly and retain even more clients.